TL;DR
PPM (parts per million) measures how much dissolved hydrogen gas is in your water, and peak PPM is a fleeting moment that starts declining the second you open the bottle. To get the highest concentration from a portable hydrogen bottle, you need to control every variable: battery charge, water type, temperature, fill level, cycle length, and electrode condition. This guide walks through 10 actionable steps, explains the science behind each one, and shows you how to verify your results at home.
What PPM Means and Why “Peak” Is the Only Number That Matters
PPM stands for parts per million. In hydrogen water, 1 ppm equals 1 milligram of dissolved molecular hydrogen (H₂) per liter of water. That’s the number that determines whether you’re getting a meaningful dose or expensive tap water.
Here’s the physics that frames everything else: at standard atmospheric pressure and room temperature, water can hold roughly 1.6 ppm of dissolved hydrogen before it reaches saturation. This limit comes from Henry’s Law, which describes how gas dissolves in liquid based on pressure and temperature. If you’ve seen bottles advertised at 3, 4, or even 5+ ppm, they aren’t breaking physics. They’re using pressurized, sealed chambers during electrolysis to force more hydrogen into solution than open-air conditions would allow. This is called supersaturation, and it’s why a quality sealed bottle outperforms an open-top design every time.
The critical thing to understand: peak PPM is a moment, not a steady state. A 500 mL open container of hydrogen water has a half-life of about two hours. That means half the dissolved hydrogen escapes within 120 minutes of exposure to air. In practice, the clock starts ticking the instant you break the seal. Every step in this guide works backward from that fact, either building concentration higher or preventing it from bleeding away.
For a deeper look at the research behind molecular hydrogen, see the science behind hydrogen water.
The 10-Step Peak PPM Checklist
These steps are ordered by workflow, not importance. Skip any one of them and you’ll leave concentration on the table.
Step 1: Fully Charge the Battery
This sounds obvious, but it matters more than most people realize. Low battery voltage means the electrolysis cell can’t sustain full power throughout the cycle. The result is a shorter effective run time and less hydrogen generated, even if the timer displays the same number of minutes. Plug in your bottle, wait for the indicator to show a full charge, and resist the urge to rush this step.
Step 2: Use Filtered Water
The water going into the bottle directly affects how much hydrogen comes out. Filtered water is the best everyday choice because it’s clean enough to protect the electrodes and PEM membrane while still containing enough dissolved minerals to support electrolysis.
Avoid these: sparkling water, flavored beverages, hot water above 40°C (104°F), and water with added supplements or electrolyte powders. These can coat electrodes, interfere with the electrolysis process, or damage the membrane outright.
There’s a nuance with distilled water worth knowing. Ultra-pure water lacks the ionic conductivity that electrolysis depends on, so some generators perform less efficiently with it. If you’re not sure which water types work best with your specific device, check the frequently asked questions page for guidance.
Step 3: Pre-Chill the Water to Around 68°F (20°C)
Cold water holds more dissolved gas than warm water. That’s basic gas solubility. But there’s a paradox most guides skip entirely: while cold water retains more hydrogen, colder temperatures slow down the electrolysis process that generates it. Ice-cold water gives you better retention but weaker production.
The practical sweet spot sits around 20°C (68°F), which is cool but not refrigerator-cold. One source in the hydrogen water space puts it simply: you can use cold water, but colder temperatures slow the hydrogen generation process. Cool tap water or water that’s been in the fridge for 20 to 30 minutes (not hours) hits the balance point.
Step 4: Fill to the Line and Minimize Headspace
Less air space above the water means less room for hydrogen to escape the liquid phase and collect as gas in the bottle’s headspace. But don’t overfill either. The electrolysis process needs a small air pocket at the top to function properly.
Follow your model’s fill line exactly. It exists for a reason: the engineering team calibrated cycle performance around that specific water volume.
Step 5: Select the Longest Available Cycle
Longer cycles generally produce higher dissolved hydrogen concentrations. The relationship isn’t perfectly linear (water temperature, mineral content, and electrode condition all play a role), but as a rule, a 10-minute cycle beats a 5-minute cycle.
Real-world test data backs this up. One independent reviewer found that filling a generator with 280 mL of purified water at around 70°F, the short mode consistently produced about 2.4 ppm while the long mode averaged closer to 3.8 ppm. That’s a 58% increase just from running a longer cycle.
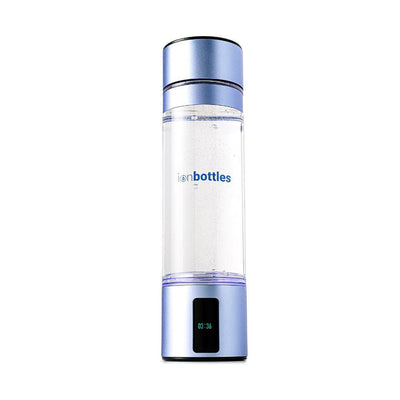
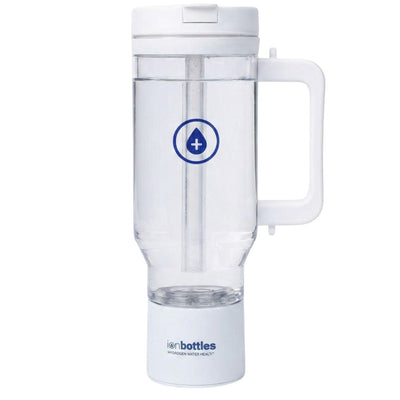
The IonBottles ATOM offers both 5-minute and 10-minute cycle modes with up to 5.0 ppm output. For model-specific cycle instructions, refer to the ATOM user manual.
Step 6: Run Back-to-Back Cycles If Your Device Permits
A quality bottle with a PEM membrane running a single pressurized cycle typically produces 1.2 to 1.6 ppm in about 5 minutes. Running a second cycle immediately after, without opening the bottle, can push concentrations up to 3.0 ppm or higher by building on the dissolved hydrogen already in solution.
Practitioners on Reddit report that running back-to-back cycles before workouts, then drinking immediately, is the most common usage pattern among regular hydrogen water users. The key is keeping the bottle sealed between cycles so supersaturation can build.
Not every bottle is designed for this. Check your device’s manual before attempting consecutive cycles, as some models need a cooldown period between runs.
Step 7: Don’t Open, Shake, or Pour
This is where many people unknowingly destroy their concentration. Every time you open the seal, hydrogen starts escaping. Shaking or stirring accelerates the process. Pouring into a glass is even worse because the water tumbles through open air and loses dissolved gas rapidly.
Drink directly from the bottle whenever possible. If you must pour (for testing, for example), do it slowly into a vessel with minimal headspace.
Step 8: Drink Within 10 to 20 Minutes of Opening
Once the seal is broken, the countdown is real. In an open container, hydrogen concentration drops steadily from the moment of exposure. Leaving hydrogen water sitting for 24 hours drops the concentration to roughly 200 ppb, which is a fraction of what the bottle produced.
The practical rule: treat each cycle as a single serving meant to be consumed right away. Don’t generate a batch in the morning and sip it through the afternoon. If you want hydrogen water at lunch, run a fresh cycle at lunch.
Step 9: Keep Electrodes Clean
This is the single most overlooked factor in long-term PPM performance. Mineral scale builds up on electrode surfaces over time, reducing electrochemical efficiency. A bottle producing 4,000 to 8,000 ppb when new may drop to 1,500 to 2,500 ppb after several months without cleaning. That’s a 40 to 60% reduction in output, and the scale is often invisible until the damage is already severe.
Cleaning protocol: Dissolve 1 teaspoon of food-grade citric acid in 400 mL of filtered water. Run one or two cycles with this solution, then rinse thoroughly with clean filtered water.
How often: If you use hard tap water (above 200 ppm TDS), deep clean every 2 to 3 weeks. With filtered water, every 6 to 12 weeks is sufficient.
What not to use: Bleach, hydrogen peroxide, baking soda, strong alkaline cleaners, or abrasive pads. These degrade the Nafion membrane, strip platinum coatings, and can leave harmful residue.
Step 10: Verify Your Results with H2Blue Drops
You can’t manage what you don’t measure. H2Blue reagent drops are the gold standard for home testing of dissolved hydrogen. Each drop corresponds to 0.1 mg/L (0.1 ppm) when added to a 6 mL water sample. You add drops one at a time, swirling gently between each, until the blue color no longer disappears. The number of drops multiplied by 0.1 gives you the ppm.
Testing protocol:
- Run a full generation cycle
- Test immediately after the cycle completes
- Pour a small sample with minimal headspace into the test vial
- Add drops one at a time, swirling gently (not shaking) between each
- Repeat the full test 2 to 3 times and average the results
This is the only reliable way to confirm your bottle’s actual output and track whether electrode cleaning is needed. ORP meters are not a substitute, which brings us to the next section.
What Kills Your PPM: Common Mistakes
| Mistake | What Happens | How Bad Is It? |
|---|---|---|
| Using hot water (>40°C) | Damages PEM membrane, reduces gas solubility | Severe, can permanently harm the device |
| Adding flavoring or supplements | Coats electrodes, interferes with electrolysis | Moderate to severe over time |
| Leaving water sitting for hours | PPM drops to a fraction within 24 hours (~200 ppb) | Defeats the purpose entirely |
| Skipping electrode cleaning | 40 to 60% PPM reduction over months | The #1 cause of declining output |
| Using ORP meter to measure H₂ | ORP measures redox potential, not hydrogen concentration | Gives misleading data |
| Half-filling the bottle | Large headspace lets H₂ escape into the air gap | 20 to 40% concentration loss (estimated) |
| Pouring into an open glass | Water tumbles through air, releasing dissolved gas | Significant immediate loss |
| Blocking the vent during operation | Dangerous pressure buildup, potential safety risk | Safety hazard |
The ORP meter issue deserves extra emphasis. ORP meters measure the overall oxidation-reduction potential of a solution, not the concentration of dissolved hydrogen. Users in science-focused Reddit communities consistently urge testing with H2 titration rather than ORP when evaluating devices. It’s one of the few points where skeptics and biohacker communities fully agree.
To understand how SPE/PEM electrolysis technology separates pure hydrogen from byproducts like ozone and chlorine, that page explains the dual-chamber venting design in detail.
PPM Ranges You Can Realistically Expect
Not all portable hydrogen bottles are created equal. Here’s what the market actually delivers, based on cross-source benchmarks:
| Device Tier | Typical PPM Range | What You Get |
|---|---|---|
| Budget (under $50) | 0.3 to 0.8 ppm | Often no PEM membrane, may produce ozone or chlorine byproducts |
| Mid-range ($50 to $150) | 1.0 to 3.0 ppm | SPE/PEM standard, 5 to 10 minute cycles |
| Premium ($150 to $300+) | 3.0 to 8.0+ ppm | Pressurized designs, longer cycles, lab-verified output |
For context, the International Hydrogen Standards Association (IHSA) sets a minimum therapeutic threshold of 0.5 mg of hydrogen per serving. Most clinical studies use hydrogen water in the 0.5 to 1.6 ppm range. Getting above 1.6 ppm means you’re exceeding what most published research used as intervention doses.
Total Dose Math: PPM Is Only Half the Equation
PPM tells you concentration, but your actual hydrogen intake depends on volume too. The formula is simple:
PPM × Volume (in liters) = milligrams of H₂ consumed
A 10 oz bottle (roughly 0.3 L) at 5.0 ppm delivers 1.5 mg of H₂ per serving. A 32 oz Tumbler at 3.0 ppm delivers about 2.8 mg per serving. Bigger volumes can deliver more total hydrogen even at lower concentrations. This is the volume-concentration tradeoff: smaller bottles hit higher PPM because the electrolysis cell saturates less water faster, but a larger bottle can still deliver a bigger total dose.
Most studies reference a daily intake of 1 to 3 mg of molecular hydrogen as the range associated with observed benefits. Whether you reach that with one high-concentration serving or two moderate ones depends on your bottle’s capacity and PPM output.
For a side-by-side comparison of capacities and concentration ranges across the full lineup, browse all hydrogen water bottles here.
The Temperature Paradox: Why “Use Cold Water” Is Incomplete Advice
Almost every hydrogen water guide on the internet tells you to use cold water. That advice is half right, and the half that’s wrong could cost you peak PPM.
Cold water retains dissolved hydrogen better because gas solubility increases as temperature drops. But the electrolysis reaction that produces that hydrogen runs less efficiently in cold water. The ions in the water move more slowly, electrical resistance increases slightly, and the overall generation rate drops.
The result: if you use ice-cold water straight from the refrigerator, your bottle generates less hydrogen during the cycle, even though the water would theoretically hold more. If you use warm water, the bottle generates hydrogen efficiently but the water can’t retain as much.
The sweet spot is around 20°C (68°F). Cool to the touch, but not cold. This gives you strong electrolysis performance and good retention. It’s a genuine insight that most ranking pages skip entirely.
Why Hydrogen Retention Matters More Than Peak PPM
Here’s a perspective that reframes the whole conversation: a bottle that generates 8,000 ppb but loses it all within seconds of opening is less useful than one that generates 6,000 ppb and retains meaningful concentration for 30 minutes.
Peak PPM is what grabs attention on product pages. Retention is what determines whether the hydrogen actually reaches your stomach. A well-engineered bottle with a sealed, pressurized design and a PEM membrane keeps dissolved hydrogen stable far longer than a cheap open-top generator that technically hits a high number for a fleeting instant.
When evaluating your steps to get peak PPM from a portable hydrogen bottle, don’t just chase the highest number on a test drop. Consider how your drinking habits align with the retention window. If you can’t drink immediately after a cycle, a bottle with better retention engineering will serve you better than one with a marginally higher peak reading.
Quick-Reference Glossary of Related Terms
PPM (Parts Per Million): The standard unit for dissolved hydrogen concentration. 1 ppm = 1 mg of H₂ per liter of water.
PPB (Parts Per Billion): A finer unit sometimes used in marketing. 1 ppm = 1,000 ppb. Always confirm which unit a manufacturer is using, because some brands list ppb numbers to make concentrations appear larger.
Henry’s Law: The principle stating that the amount of gas dissolved in a liquid is proportional to the pressure of that gas above the liquid. This is why sealed, pressurized bottles can exceed the 1.6 ppm atmospheric saturation limit.
SPE/PEM (Solid Polymer Electrolyte / Proton Exchange Membrane): The electrolysis technology used in quality hydrogen bottles. It separates hydrogen from oxygen and byproducts (ozone, chlorine) using a selective membrane, producing pure H₂.
Supersaturation: A state where dissolved gas concentration exceeds the equilibrium limit. Achieved in portable bottles through pressurized electrolysis in a sealed chamber.
Nanobubbles: Extremely small gas bubbles (under 200 nanometers) that remain suspended in water longer than larger bubbles. They contribute to measurable hydrogen concentration beyond standard dissolved gas readings.
Headspace: The air pocket between the water surface and the bottle cap. Larger headspace gives hydrogen more room to escape the liquid phase, reducing dissolved concentration.
Electrode Scaling: The accumulation of mineral deposits (primarily calcium and magnesium carbonate) on electrode surfaces. The primary cause of declining hydrogen output in bottles that are 6 to 12 months old.
H2Blue Titration: A chemical testing method using reagent drops to measure dissolved hydrogen. Each drop neutralizes 0.1 ppm of H₂ in a 6 mL sample. The industry standard for home verification.
ORP (Oxidation-Reduction Potential): A measurement of a solution’s tendency to gain or lose electrons, expressed in millivolts. It does not directly measure hydrogen concentration, despite being widely used in marketing materials.
Putting It All Together
The steps to get peak PPM from a portable hydrogen bottle aren’t complicated individually. Charge fully, use filtered water at a cool temperature, fill to the line, run the longest cycle, keep the bottle sealed, and drink immediately. The challenge is doing all of them consistently while also maintaining the device through regular electrode cleaning.
Most people buy a hydrogen bottle, run it a few times, and never think about optimization. The users who actually get advertised performance levels are the ones who treat each variable seriously. Battery charge, water quality, temperature, headspace, cycle selection, and electrode maintenance all compound. Get them all right and you’ll consistently hit concentrations that most users never see.
If you’re ready to start with a device engineered for high-concentration output, the IonBottles ATOM hydrogen water bottle delivers up to 5.0 ppm with SPE/PEM electrolysis, a 10-minute cycle mode, and a sealed pressurized design built for the peak PPM workflow described in this guide.
Frequently Asked Questions
What is a good PPM for hydrogen water?
The IHSA sets a minimum therapeutic threshold at 0.5 mg of H₂ per serving. Most clinical studies use concentrations between 0.5 and 1.6 ppm. Anything above 1.6 ppm means your device is producing supersaturated water, which exceeds what the majority of published research has used.
Can I test my hydrogen bottle’s PPM with an ORP meter?
No. ORP meters measure oxidation-reduction potential in millivolts, which correlates loosely with hydrogen presence but does not measure actual dissolved hydrogen concentration. H2Blue titration drops are the standard for home testing. Even skeptics in chemistry forums agree on this point.
Why does my hydrogen bottle seem to produce less PPM over time?
Electrode scaling is almost certainly the cause. Mineral deposits from water build up on the electrode surfaces and reduce electrochemical efficiency. This can cut your output by 40 to 60% over several months. Regular cleaning with food-grade citric acid solution restores performance.
Is distilled water better for hydrogen bottles?
Not necessarily. Distilled water lacks the dissolved minerals (ions) that support efficient electrolysis. Filtered water strikes the right balance: clean enough to protect the membrane and electrodes, mineral-rich enough to sustain strong hydrogen production.
How long does hydrogen stay in the water after a cycle?
In an open container, dissolved hydrogen has a half-life of about two hours. Practically, you should drink the water within 10 to 20 minutes of opening the bottle for peak concentration. Leaving it for 24 hours drops the reading to roughly 200 ppb.
Does a bigger bottle mean more hydrogen?
Not more concentration, but potentially more total dose. Smaller bottles often hit higher PPM because the electrolysis cell saturates less water faster. But a larger bottle at a lower PPM can still deliver more total milligrams of hydrogen per serving. Use the formula: PPM × volume in liters = mg of H₂ consumed.
Should I use ice-cold water for higher PPM?
Cold water retains more dissolved hydrogen, but it also slows down the electrolysis process. The optimal temperature is around 20°C (68°F), which is cool but not refrigerator-cold. This gives you strong hydrogen generation and good retention simultaneously.
How often should I clean my hydrogen bottle’s electrodes?
If you use hard water (above 200 ppm TDS), clean every 2 to 3 weeks. With filtered water, every 6 to 12 weeks is sufficient. Use 1 teaspoon of food-grade citric acid dissolved in 400 mL of filtered water, run a cycle or two, then rinse thoroughly.